Tuesday, 26 March 2013

Working with bleach....

...no don't worry I'm not going to be posting about housework - something much more fun!
Here is a scrapbook layout where I used bleach to create a background effect.

Although I didn't actually realise at the time I think it gives a bit of a sandy effect which suits my penguin photo!
I started with a piece of Basic Black cardstock which I cut down to 8" x 8" to fit into an 8" page protector.  I then cut a piece of Basic Gray card stock slightly smaller to stick ontop but leave a slight black border.  I sprayed the gray with bleach using a Stampin Spritzer to get the background effect. 

I also added a few glimmer brads in black and mounted my penguin photo first onto silver glimmer paper, then basic black card stock to make it "pop" a bit!


Finally I stamped onto glimmer paper using the phrase from the Fees Good stamp set and also the penguin from the Zoo Review set.  I used my Stampin Write markers to colour in his feet, beak and wings.

Another picture without the flash so less sparkle but you can see how well you can stamp onto glimmer paper - I'd never tried stamping on glimmer paper before and was pleasantly surprised!!

If you would like to know more about these or other Stampin' Up! products or would be interested in hosting a workshop then do get in touch!

Have a great day!!

Stephanie-Emma x


Photobucket Photobucket Photobucket Photobucket

Wednesday, 20 March 2013

WOYWW - craft room tour!

A lot of my customers ask me what my craft room is like and as my blog is fairly new I thought I'd give everyone a look around, and hopefully make some new friends!
 
My craft room is mainly made up of 3 Ikea units and my desk.


This is the view from the door as you enter the room where you can see two of the units and my desk.

This is the view from the other side, you can see the third unit, my paper storage rack, the drawers I keep all my catalogues and business supplies in, and a hint of the rails that are on the wall in front of my desk!

 
As the phenomenon of WOYWW is about what is ON your desk, here is the desk shot!  Not a lot on there, as a result of just tidying up! EDIT: thank you for the compliments on my desk my lovely Mum got it for me a few years ago, its from ikea.
 
You might be able to spot my little craft room buddy sat on the floor in front of the drawers though....?


Here he is.... he was less than impressed by my tidying or the impromtu photo shoot and soon ran off to hide under the arm chair:
 
 
The armchair was meant to be for Mr Boots to come and sit with me in the craft room but more often BunnyBoots perches on there watching the TV! (Or hides underneath it ripping up magazines!)
 

Here's a close up of the scrapbook layout I was working on.  Mr Boots and I got married almost 2 weeks ago and I loved this photo so much I just had to print and scrap it straight away!  I am looking forward to many more wedding pages but I think this will be my favourite!


I used More Amore designer series paper for the base, with a square of Primrose Petals on top of that.  The heart on top of the heart doily is also cut from the More Amore paper.  The rest is all from the Artisan Embellishment kit apart from the Flower Trim which I sprayed with Pink Pirouette reinker as it is so similar to my dress which was covered with ribbon flowers but was pale pink!


In the unit behind my desk I keep all my stamps, tools, stamp cleaner (and various other dangerous liquids!), markers, Big Shot and all sorts!  I have a little display on the top of my favourite things.  A number of owls (including one in the cage!), a wedding card received from a good friend Helen - there will be more joining but shamefully haven't unpacked that bag yet as I took all the cards that arrived before the wedding to the hotel with me to display!

The butterfly picture on the end was made by my friend Harvey who is 3 years old and just to the left of that is:

 
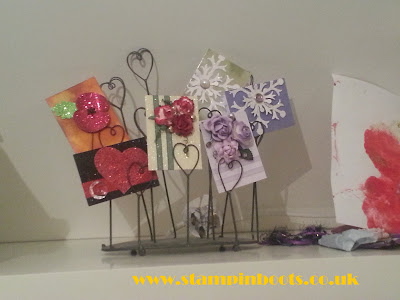
My display of ATCs made by my Auntie Dionne!  Aren't they amazing?

 
On the unit nearest the door is my inkpads, ribbons, embellishments and paper storage!

 
In the other corner is my TV and rails holding my punches and what not.  You might notice that while there are cupboards and boxes in the bottom half of the other units the end ones are left free on this unit:
 
 
That is because Bunny Boots has his bedroom/bathroom/private area behind the TV and likes to use these two squares as his way in and out (or just to perch and watch over his kingdom!)

 
Here's a sneaky shot of his space behind the TV! (For all the naysayers just to prove it's not filthy and disgusting having a house bunny!  As you can see he's very happy and at home!! ~ and perfectly toilet trained!!!)
 
 
Thank you for popping by to see my room I look forward to hopping through all of yours although it may not be until this evening!  I promise I will be back for future WOYWWs but I can't promise it will ever be this tidy again!!!!!!!!!
 
If anyone ever needs a Stampin' Up! demonstrator, crafty friend or to place an order for the products used on my layout or any other Stampin' Up! products you can contact me on stephanie.emma6@sky.com or www.facebook.com/stampinboots or I am also on Twitter @Stampinboots
 
Don't forget there are only 2 days left of saleabration after today to get a free item with each £45 spent!

Stephanie-Emma x

 
Photobucket  Photobucket  Photobucket  Photobucket 
 

Monday, 25 February 2013

Artisan Embellishment Kit

Back so soon!  Are you surprised?

I'm trying my best to keep it up!  And with the wedding countdown at 11 days I'm quite impressed with myself!!  I had to have some time to myself last night and as the wedding crafts were almost finished I decided to have some fun with the new Artisan Embellishment Kit in the Spring catalogue!

Be warned.  Not only will you need this, you will need this multiple times!!!!!  As soon as I saw the new catalogue this was my favourite thing in it!

Here is the card I made using as many elements from the kit as I could without going *too* overboard!


I used a non Stampin' Up! image and cut it out using the Hearts Collection Framelits dies and Big Shot.   I then cut out the largest scalloped heart from the framelits collection from a sheet of Fan Fair Designer Series Paper.
 
My card Base is whisper white with a piece of Floral District Designer Series Paper underneath a piece of First Edition Speciality Designer Series Paper.
 
On top of this at the bottom I added a variety of items from the Artisan Embellishment kit:


The pink scalloped lace, floral lace, tickets and two tags (with fancy hearts cut out of the top) are all from in the Artisan Embellishment Kit.
 
I also added a length of the Flower Trim (my second love from the new catalogue!!!)

 
At the top of the card I cut out hearts and banners using the Hearts a Fluter framelits dies from both Floral District and Fan Fair designer series papers.
 
On top of the Fan Fair hearts I added resin flowers from the Artisan Embellishment kit, and on the Floral District hearts I added basic rhinestones.
 
I hope you like the card, I was quite pleased with it myself :)
 
 
If you would like to know more about any of the products I have used, to place an order, or request a catalogue please email me on stephanie.emma6@sky.com
 
Have a great day and I hope to be back very soon with more!!!


Thursday, 21 February 2013

Bad blogger!

I am so sorry that I haven't blogged much recently!

It's shameful as I should be showing you all the fabulous Saleabration freebies available!

My excuse is that I'm getting married in 15 days so things have been a little manic around these parts...  However the wedding crafts are almost complete and as soon as they are I will be 100% Spring Catalogue focussed (I have a massive hawl from the new Spring/Summer catalogue and can't wait to play with it and show you the gorgeousness in there!!!

Hopefully I'll get a chance at the weekend or early next week and I have some ideas up my sleeve for some projects so will be sure to share those for you.

Until then here are a few cards using saleabration freebies - don't forget that until 22 March for every £45 spend you can choose a free item from the exclusive saleabration items (which will NEVER be available to purchase) and a few items from the main catalogue.


This card uses a card base, twine and gems from the Happy Hello Simply Sent card kit.
 
I also used a circle and scalloped circle punch and the sentiment from Occasions Alphabet stamp set.
 
Finally.... I stuck a piece of glimmer paper under the card blank to give it a bit more sparkle!!
 
 
This card I have seen a lot of on the internet and had to CASE the design!

Using the Patterned Occassions stamp set I stamped the plaster three times and cut it out.

The rest of my card is a Whisper White card base,  a piece of Tangerine Tango card stock and another piece of Whisper White torn into two.  I then stamped the "recover rapidly" sentiment in Island Indigo, Tangerine Tango and Rich Razzleberry to match the plasters!


This card is another Whisper White card base with then a piece of Island Indigo card stock under a piece of the Sycamore Street Designer Series paper. 
 
The image and sentiment from Patterned Occasions was stamped in Tangerine Tango onto Whisper White, matted onto a piece of Island Indigo with the Tangerine Tango ribbon from the Sycamore Street ribbons and buttons pack added.

Finally a pearl in the middle of my ribbon flower.


I had so much fun with my ribbon flower that I carried on and made three more using the ribbons from the Sycamore Street ribbon and button pack.  In the centre of each flower I added a Vintage Faceted Button (also available as a saleabration freebie!!)
 
I cut strips of the Sycamore Street DSP as stems for the flowers and finally stamped in Rich Razzleberry 'Happiest Birthday' from the Apothecary Art stamp set and 'Mum' from the For My Family stamp set.


Finally..... Using the Happy Hello Simply Sent card kit again!
 
I stamped the sentiment from the Vintage Verses saleabration set and cut it using the Window Frames framelits dies.
 
 
Just a reminder of the freebies you can get during saleabration for each £45 you spend:


I still have availability for workshops and parties on the following dates if you are interested get in touch!!
 
Available dates for a saleabration party/workshop:
Tuesday 26th February
Saturday 2nd March
Sunday 3trd March
Wednesday 13th March
Monday 18th March
Tuesday 19th March
Wednesday 20th March
Thursday 21st March
Friday 22nd March
 
Don't forget if you are interested in signing up as a Stampin' Up! demonstration Saleabration is the best time of the year to do it!  To find out more about the benefits of joining my team please email me on stephanie.emma6@sky.com
 
 
Photobucket Photobucket Photobucket Photobucket


Wednesday, 23 January 2013

Saleabration is here!!!!!!

Saleabration is here and this year it is bigger and better than ever before!!!

From now until 22 March for every £45 spent on Stampin' Up! products you can receive a free product.  This year the choice includes exclusive stamp sets, designer series paper, ribbon and button set, embossing folder and punch!  In addition to this there are also some products from the annual catalogue you can also earn for free!

Here is a summary of the products available as freebies for a £45 spend during saleabration:


The details of these will remain on my Special Offers page above for the duration of the offer if you want to come back later and take another look!

In the meantime here is the second of my saleabration cards (for the first see my previous post which also uses a different stamp from the same set)


This card uses four of the exclusive Saleabration products available:

- Patterned Occasions stamp set
- Vintage Verses stamp set
- Sycamore Street designer series paper
- Sycamore Street ribbon & button pack

To find out more or place an order to earn your own Saleabration free products contact me!


Photobucket Photobucket Photobucket Photobucket